Electron 是一个能让你使用 JavaScript, HTML 和 CSS 来创建桌面应用程序的框架。 这些应用程序可以打包后在 macOS、Windows 和 Linux 上直接运行,或者通过 Mac App Store 或微软商店进行分发。
通常,你可以使用操作系统 (OS) 特定的本地应用程序框架来创建一个桌面应用程序。 Electron 可以使用你了解的技术来编写应用程序。
Electron = Chromium + Node.js + Native API
Table of contents
Open Table of contents
安装 Electron
为您的项目创建一个文件夹并安装 Electron:
mkdir my-electron-app && cd my-electron-app
npm init -y
npm i --save-dev electron
electron 热更新/热加载
- 安装
electron-reloader
npm install electron-reloader --save-dev
- 在主进程 js 文件(main.js)加入如下代码:
try {
  require("electron-reloader")(module);
} catch (_) {}- 重启测试,更改 js css html 等文件都能自动加载更新 electron
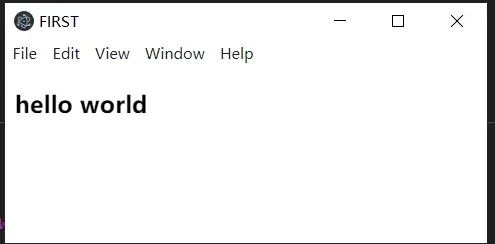
第一个 hello world
- 新建一个 index.html
<!doctype html>
<html lang="en">
  <head>
    <meta charset="UTF-8" />
    <meta http-equiv="X-UA-Compatible" content="IE=edge" />
    <meta name="viewport" content="width=device-width, initial-scale=1.0" />
    <title>FIRST</title>
  </head>

  <body>
    <h3>hello world</h3>
  </body>
</html>- 新建一个 main.js: 主进程文件
// 引入 electron 模块
const { app, BrowserWindow } = require("electron");
let mainWindow = null;
app.whenReady().then(() => {
  // 新建窗口,宽高为 200*200
  mainWindow = new BrowserWindow({ width: 400, height: 200 });
  // 加载 index.html
  mainWindow.loadFile("index.html");
  // 监听关闭事件,把主窗口设置为 null
  mainWindow.on("closed", () => {
    console.log("closed");
    mainWindow = null;
  });
});这时候打开终端,在终端里输入electron .就可以打开窗口了。

**注意:**检查 package.json,main 必须为主进程文件:main.js.(默认为 index.js)
附:文件结构
- node_modules
- index.html
- main.js
- package.json
- package-lock.json
或者
git clone https://github.com/electron/electron-quick-start
# Go into the repository
cd electron-quick-start
# Install dependencies
npm install
# Run the app
npm start
读取文件栗子
- 新建一个 data.md
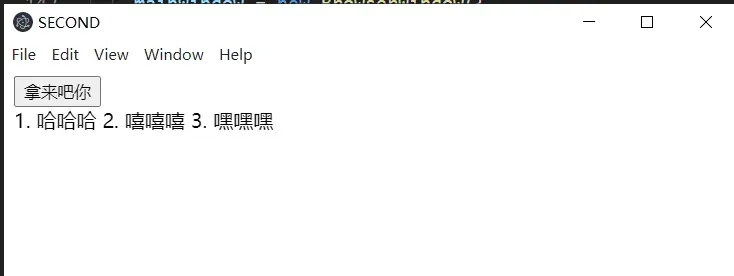
1. 哈哈哈
2. 嘻嘻嘻
3. 嘿嘿嘿- 改写 index.html
<!doctype html>
<html lang="en">
  <head>
    <meta charset="UTF-8" />
    <meta http-equiv="X-UA-Compatible" content="IE=edge" />
    <meta name="viewport" content="width=device-width, initial-scale=1.0" />
    <title>SECOND</title>
  </head>

  <body>
    <button id="btn">拿来吧你</button>
    <div id="wrapper"></div>
  </body>
</html>- 新建 renderer 文件夹,在 renderer 文件夹下新建一个 index.js
const fs = require("fs");

window.onload = () => {
  const btn = document.querySelector("#btn");
  const wrapper = document.querySelector("#wrapper");
  btn.onclick = () => {
    fs.readFile("data.md", (error, data) => {
      wrapper.innerHTML = data;
    });
  };
};- 坑:控制台报错:require is not defined 改写 main.js
app.on("ready", () => {
  mainWindow = new BrowserWindow({
    webPreferences: {
      nodeIntegration: true,
      contextIsolation: false,
    },
  });
});
这时候点击按钮

附:文件结构
- node_modules
- renderer
- index.js
- index.html
- main.js
- package.json
- package-lock.json
remote 模块
Electron 有主进程和渲染进程,Electron 的 API 方法和模块也是分为可以在主进程和渲染进程中使用。那如果我们想在渲染进程中使用主进程中的模块方法时,可以使用 Electron Remote 解决在渲染和主进程间的通讯。
- index.html
<!doctype html>
<html lang="en">
  <head>
    <meta charset="UTF-8" />
    <meta http-equiv="X-UA-Compatible" content="IE=edge" />
    <meta name="viewport" content="width=device-width, initial-scale=1.0" />
    <title>THIRD</title>
  </head>

  <body>
    <button id="btn">打开吧你</button>
    <script src="renderer/demo2.js"></script>
  </body>
</html>- renderer/demo2.js
const { BrowserWindow } = require("electron").remote;
window.onload = () => {
  const btn = document.querySelector("#btn");
  btn.onclick = () => {
    // 打开新窗口
    let newWindow = new BrowserWindow({
      width: 400,
      height: 200,
    });
    newWindow.loadFile("newWindow.html");
    newWindow.on("closed", () => {
      newWindow = null;
    });
  };
};- 新建 newWindow.html
<!doctype html>
<html lang="en">
  <head>
    <meta charset="UTF-8" />
    <meta http-equiv="X-UA-Compatible" content="IE=edge" />
    <meta name="viewport" content="width=device-width, initial-scale=1.0" />
    <title>我是新打开的窗口</title>
  </head>

  <body>
    <h2>我是新来的</h2>
  </body>
</html>- 坑:改写 main.js
const { app, BrowserWindow } = require("electron");
let mainWindow = null;
app.whenReady().then(() => {
  mainWindow = new BrowserWindow({
    width: 600,
    height: 400,
    webPreferences: {
      nodeIntegration: true,
      contextIsolation: false,
      // 需要打开
      enableRemoteModule: true,
    },
  });
  mainWindow.loadFile("index.html");
  mainWindow.on("closed", () => {
    mainWindow = null;
  });
});
这时候,点击按钮就可以打开新窗口了 附:文件结构
- node_modules
- renderer
- index.js
- demo2.js
- index.html
- newWindow.html
- main.js
- package.json
- package-lock.json
菜单基本使用
- 新建 main 文件夹,将 main.js 移至 main 文件夹下,主进程中用到的代码我们都写到这里 新建 menu.js
const { Menu, BrowserWindow } = require("electron");

const template = [
  {
    label: "menu1",
    submenu: [
      {
        label: "新建窗口",
        accelerator: `ctrl+n`, // 快捷键
        click: () => {
          var win = new BrowserWindow({
            width: 500,
            height: 500,
            webPreferences: {
              nodeIntegration: true,
            },
          });
          win.loadFile("newWindow.html");
          win.on("closed", () => {
            win = null;
          });
        },
      },
      {
        label: "menu1_2",
      },
    ],
  },
  {
    label: "menu2",
    submenu: [
      {
        label: "menu2_1",
      },
      {
        label: "menu2_2",
      },
      {
        label: "menu2_3",
      },
    ],
  },
];

Menu.setApplicationMenu(Menu.buildFromTemplate(template));- 在 main.js 中导入 menu.js
const { app, BrowserWindow } = require("electron");

let mainWindow = null;
app.whenReady().then(() => {
  mainWindow = new BrowserWindow({
    width: 600,
    height: 400,
    webPreferences: {
      nodeIntegration: true,
      contextIsolation: false,
      // 需要打开
      enableRemoteModule: true,
    },
  });
  require("./menu.js");
  mainWindow.loadFile("index.html");
  mainWindow.webContents.openDevTools();
  mainWindow.on("closed", () => {
    mainWindow = null;
  });
});
如图

附:文件结构
- node_modules
- main
- main.js
- menu.js
- renderer
- index.js
- demo2.js
- index.html
- newWindow.html
- package.json (注意将主进程文件路径修改为 main/main.js)
- package-lock.json
右键菜单
右键菜单的响应事件是写在渲染进程中的,也就是写在 index.html 中的,所以要是使用,就用到到 remote 模块进行操作了。
持续更新中…